Framing the Ride: How to Choose the Right Camera Gear for Cycling Photography
Updated: Sep 7

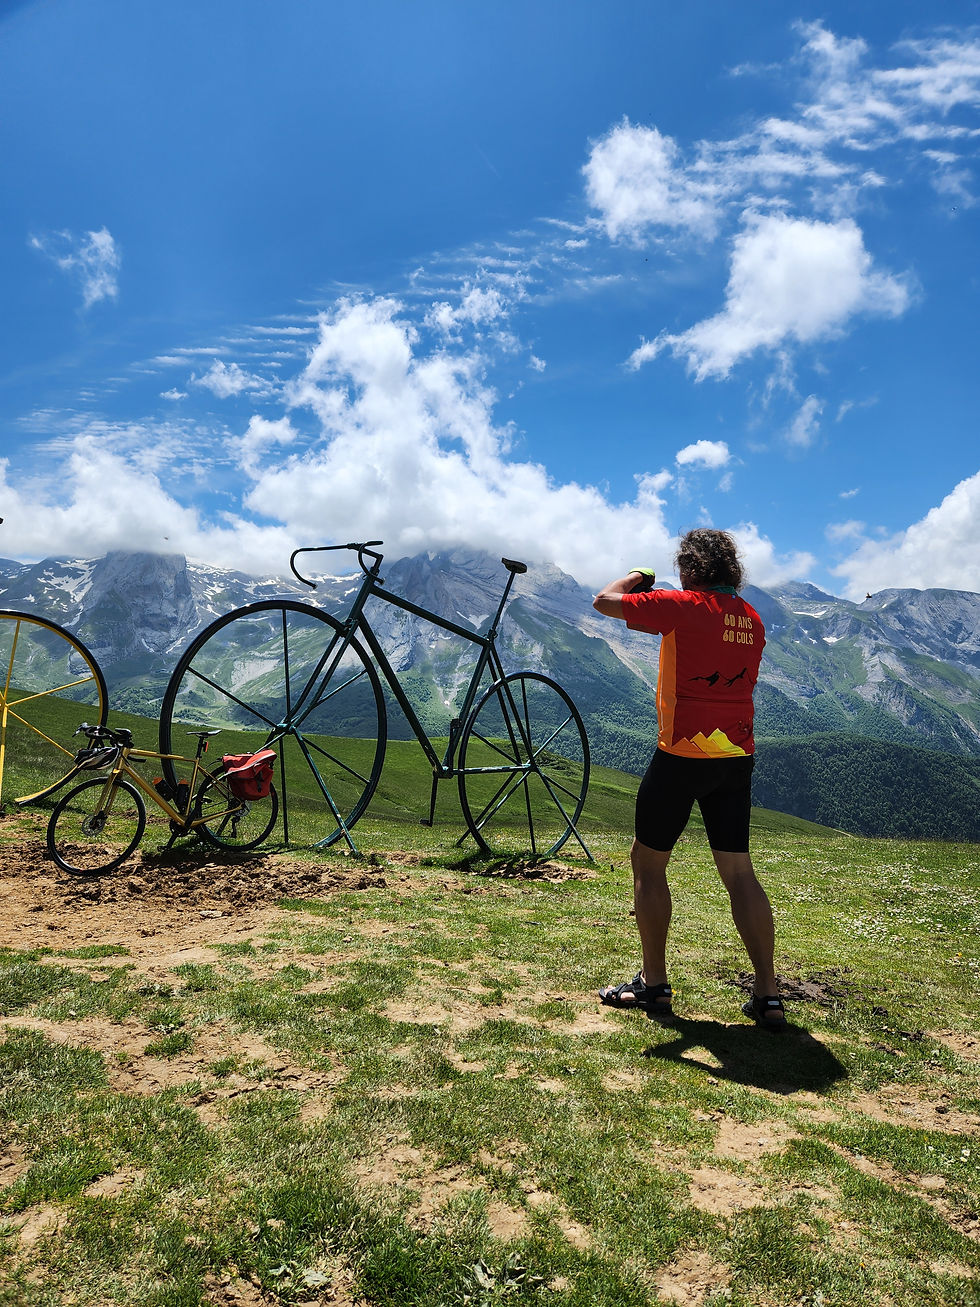
Majestic giant bicycles are set against the breathtaking mountains of Col d'Aubisque, embodying the essence of cycling in the Pyrenees. On the road or navigating singletrack, every gram matters. However, if photography is important to you, achieving the perfect balance between ride quality and image quality is a continual challenge.
Whether we're documenting route highlights for Debbie Pyrenees Velo or creating content as a Ride with GPS ambassador, my choice of camera is entirely determined by the ride's mission. There isn't one "best camera for cycling"—only the right tool for the day's goal.
This is how Tom and I align our photography equipment with the type of ride, along with some practical composition tips to turn basic ride photos into captivating images. Occasionally, we skip the cameras altogether and simply enjoy the ride.
1. Choosing Your Gear Based on the Ride
The Pocket Powerhouse: Sony RX100 VII
Best for: Everyday road rides, long endurance miles, fast group rides, and maximum versatility.
The Setup: Fixed 24–200mm equivalent lens with a compact form factor.
For those seeking speed, versatility, and minimal size, the Sony RX100 VII stands out as one of the most adaptable pocket cameras for cyclists. It features a 24–200mm zoom range in a size that fits comfortably in a jersey pocket, allowing you to capture everything from expansive landscapes to close-up shots of cyclists ahead. Its autofocus system and flexible focus points surpass any smartphone, offering genuine camera controls without the hassle of an interchangeable lens system.
The All-Terrain Workhorse: Fujifilm X-H2
Best for: Mountain biking, dedicated photo rides, or covering pro events like the Tour de France if you want to be lightweight.
The Setup: APS-C sensor, ~24–120mm full-frame equivalent zoom (such as the XF 16–80mm lens), total weight ~1kg.
When trail riding or heading out specifically to shoot an event, step up to a dedicated mirrorless setup. The Fuji X-H2, paired with a versatile kit lens, offers incredible sharpness, rapid focus tracking for capturing fast-moving action, and a robust build quality.
To carry a 1kg setup comfortably on the bike, ditch the standard neck strap. Use an action-specific cross-body harness (like a 3-point strap) that keeps the camera locked against your back while riding, or stow it securely in a dedicated riding pack.
TDF Tip: If you were going to ride your bike to watch a stage of the Tour de France, this is the exact setup to pack. A Fujifilm X-H2 with a 16–80mm lens gives you fast enough autofocus to catch the peloton flying past at 50 km/h, without forcing you to haul a 5kg pro full-frame setup up a mountain pass.
The Aerial Perspective: DJI Neo 2
Best for: Capturing scale, sweeping climbs, and dramatic landscape reveals.
Drones offer a unique perspective to cycling photography that ground cameras cannot achieve. An ultra-lightweight drone, such as the DJI Neo series, enables you to capture the winding curves of a mountain pass or follow a solo cyclist through an expansive landscape, instantly enhancing the cinematic quality of a route recap.
Mounting Positions for GoPro on a Bike
On Your Helmet
Mounting a GoPro on your helmet captures the rider's point of view, offering an immersive experience by mimicking the rider's perspective. Ensure the mount is secure to avoid unwanted angles or shaky footage.
On Your Handlebars
Mounting on the handlebars provides a stable view of the road ahead, including the rider's hands and controls, adding context. This position is flexible for capturing different scenes and technical manoeuvres.
At the Back of Your Bike Seat
Mounting at the back of the bike seat showcases the rider in action and the trail behind, effective for group rides and highlighting bike performance and terrain.
On a Chest Harness
Using a chest harness captures the rider's upper body and handlebars, adding a dynamic shot. It stabilises the camera and captures movements and reactions, enhancing the narrative.
The Pros and Cons of Using a GoPro
GoPro cameras are robust and deliver high-quality video, though their processing speed can be sluggish, affecting editing or uploads. Each mounting position offers creative opportunities, but it's vital to ensure stability during rides.
Using a GoPro on a bike enhances documenting cycling experiences. With various mounting options, riders can capture unique angles and perspectives. However, consider potential drawbacks like processing speed to ensure a smooth filming experience.
The Quick Snapshot: Smartphone (e.g., Samsung S25 Ultra)
Best for: Social media check-ins, quick coffee stop photos, or emergency documentation.
Smartphones have significantly advanced, yet it's crucial to recognise their limitations: they are typically poor at capturing high-speed action photography. Although a contemporary flagship phone excels at producing excellent still images and manages post-processing on its own, its digital processing capabilities, absence of physical shutter controls, and small sensor make it challenging to handle fast-moving cyclists and intricate lighting conditions.
Heavy Glass: Pro Full-Frame Setups (Nikon Z8 + 70–200mm)

Best for: Dedicated media motorcycle crews or stationary side-of-the-road event coverage.
Using a Nikon Z8 with a 70–200mm lens by the roadside can produce magazine-worthy images, but realistically, taking a full-frame camera with professional telephoto lenses on a regular bike ride isn't practical. Save the heavy full-frame equipment for days when you're not tackling significant climbs or cycling in the Tour de France.
While a Nikon Z8 paired with a 70–200mm f/2.8 delivers edge-to-edge sharpness, shallow depth of field, and stunning background blur that can turn roadside cycling shots into magazine covers, bringing that setup on a real ride introduces major practical challenges.
Here is an expanded look at why heavy full-frame setups struggle on regular rides, the physical trade-offs involved, and smarter alternatives for capturing high-end cycling photography.
1. The Physical & Ergonomic Cost
Setting aside the fear of crashing with thousands of dollars of glass, the pure weight and bulk of pro camera gear rapidly alter your riding experience:
The Weight Penalty: A Nikon Z8 (~910g) plus a 70–200mm f/2.8 VR S (~1,360g) totals roughly 2.3 kg (5.1 lbs) before adding a strap, bag, or spare batteries. On a flat spin, that weight is noticeable; on a long climb, it feels twice as heavy.
Spine & Shoulder Strain: Wearing a cross-body sling or backpack with over 2 kg resting on your back forces your posture out of alignment. Over hours in the saddle, this causes lower back fatigue, neck tension, and saddle discomfort.
Bike Handling & Safety: Mounting a heavy setup in a handlebar bag or pannier elevates your centre of gravity or makes steering sluggish during high-speed descents and tight cornering.
2. Missed Moments & Practicality
The best cycling photography relies on agility—stopping quickly, framing the rider, and hopping back on the bike.
Slow Deployment: Safely pulling a large body and telephoto lens out of a zipped backpack or handlebar bag takes time. By the time you unclip, unbag, and boot up, the breakaways or scenic light may already be gone.
Sweat & Condensation: Tucking a cold camera into a back pocket or tight bag right against a sweaty jersey can lead to moisture building up on the outer element or inside light-sealed compartments.
3. Practical Alternatives for the Road
If your main goal is enjoying the ride while still capturing great shots, consider scaling down the gear based on the type of ride:
Setup Category | Example Gear | Pros | Best For |
Premium Compacts | Sony RX100 MKVII | Fits in a jersey pocket, one-handed operation, surprisingly sharp | Fast group rides, training sessions |
Lightweight Mirrorless | Fujifilm X-H2 | Interchangeable lenses, dedicated dial control, under 700g total | Scenic endurance rides (MTB), casual spins |
Action & Smartphone | High-end smartphone, Insta360, GoPro, DJI Neo2 | Zero setup time, instant upload, weather-proof | Training rides, rapid road snapshots |
4. When to Bring the Big Rig
Save the full-frame body and fast telephoto zoom for days dedicated specifically to photography rather than performance riding:
The Golden Rule: Choose either Rider Mode or Photographer Mode. Trying to do both on the same outing usually compromises both your ride metrics and your shot count.
Dedicated Shoot Days: Drive or ride casually to a specific mountain pass or hairpin curve, set up camp, and shoot passing riders or friends taking turns on the climb.
Support Vehicle Rides: Keep the heavy gear in a follow vehicle or with a spectator at designated points along the route.
Short Leisure Spins: Flat coffee rides where speed, climbing pace, and total mileage take a backseat to enjoying the scenery.
Framing Speed and Scale: July 2023 in the Pyrenees
The Pau Time Trial | July 30, 2023
Time trials strip cycling down to its rawest visual elements: line, form, and pure speed against the clock. Shooting the stage in Gan, Pyrenees was a study in precision—capturing aero tucks cutting through alternating shadows and bright summer sun along the rolling, technical course. From low-angle framing on tight corners to tight shots catching the intensity in a rider’s eyes on the power sections, the camera captured the quiet, isolated violence of racing against time.
The Marie-Blanque Descent | July 5, 2023
Moving to the mountain stage, the scale transformed completely. High on the east descent of the Col de Marie-Blanque, the photography shifted from technical precision to raw alpine drama. Long lenses compressed the riders against steep Pyrenean backdrop textures, while wide shots caught the terrifying speed of the lead group sweeping through high-altitude switchbacks. The contrast was stark: isolated silhouettes carved against dramatic mountain light, capturing both the vastness of the landscape and the razor-thin margins of a high-speed descent.
2. Quick Composition & Technique Tips for Cyclists
Having great gear doesn't matter if you shoot everything from chest height at a standstill.

To instantly elevate your ride photography:
Look for Unique Perspectives: Avoid the standard "standing on the road shoulder holding the phone at eye level" shot. Get up high on an embankment, or drop down low to the asphalt to make the road and rider look dramatic.
Embrace Telephoto Compression: Don't just shoot wide. Zooming in (80mm–200mm equivalent) pulls the background closer to the rider, making mountain backdrops look steeper and grander.

Stop Trying to Get Everything in the Frame: The photograph that tries to capture every mountain peak, the entire road, and three riders usually ends up looking busy and cluttered. Pick a clear subject—a single rider, a tight corner, or a detail—and let the rest frame the shot.

Play with Light & Shadows: Position yourself so the sun is behind your subject to create striking silhouettes and atmospheric rim lighting. Alternatively, deliberately slow your shutter speed slightly to add motion blur to the wheels and background while keeping the rider sharp.

3. The Golden Rule of Spectator Photography
If you are roadside at a major race like the Tour de France, remember this trade-off: If you spend your time setting up shots, adjusting focus points, and looking through a viewfinder, you are missing the race with your own eyes.
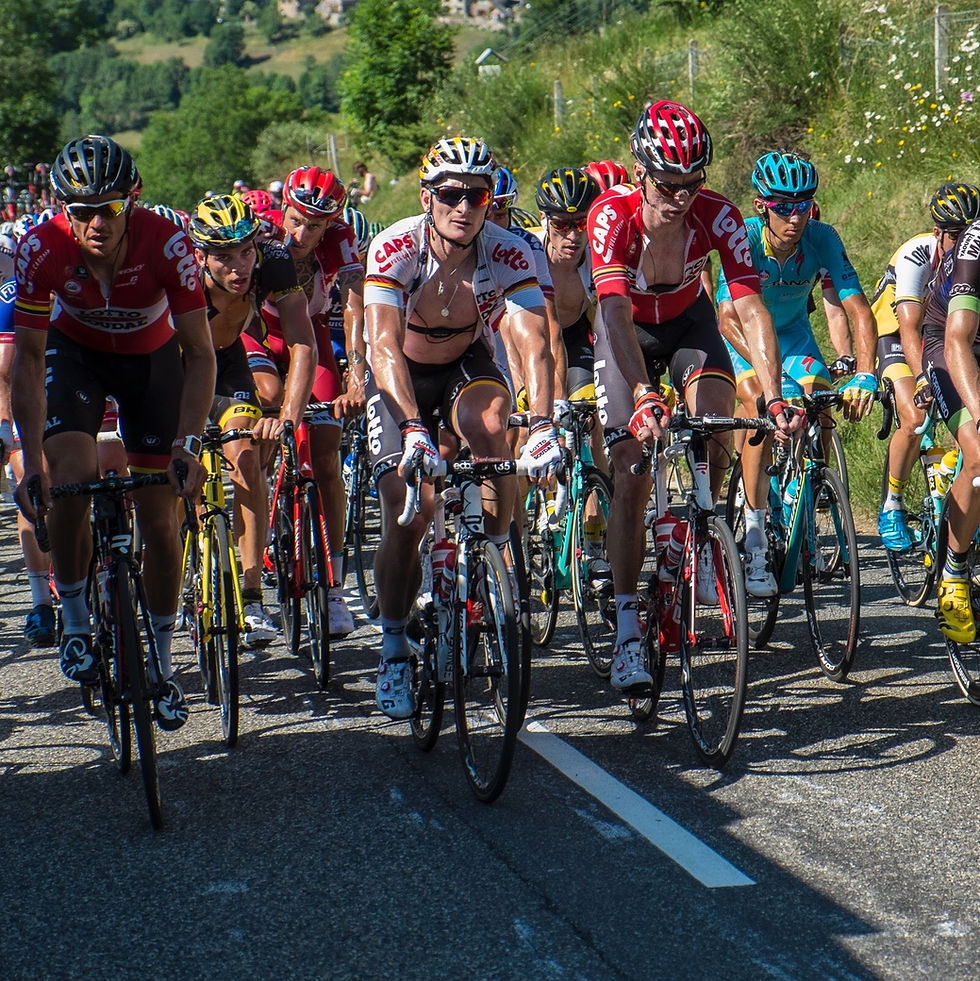
Unless you are operating a camera with a remote trigger or are there purely for a media assignment, make a decision. Capture a few deliberate shots as the breakaway nears, then put the camera down and enjoy the spectacle as the peloton rushes past. However, do not obstruct the cyclists or get in their way.
Ultimately, the best camera is the one you have with you in your hand.
What’s in your jersey pocket on ride day? Do you prefer the speed of a compact camera or the simplicity of a phone? Let me know in the comments below!
We utilise all the aforementioned items and possess multiple camera bodies, lenses, and drones of various sizes, along with the required pilot's license.
All photography copyright Tom Materman and Debbie Kennedy

Comments